In my previous post we learn how to install Linux through Oracle Vitual box that you can found from following link
After finishing your Ubuntu installation, you are ready to install SQL Server. You can install it through Ubuntu or your host windows using command line. Installing from Windows you need to install putty easily available on internet. Install it and connect it using Network IP and run all steps mentioned below.
I am installing it through Ubuntu plate form and following are the steps for that
1- Execute “sudo apt-get update”
2- Execute “sudo apt-get upgrade” is an optional step
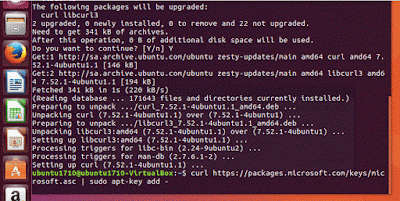
3- Run curl command to import GPG key. GPG keys also provide cryptographic privacy and authentication. If curl command is not installed on this machine so we need to run the suggested command to install the curl command first.
4- After successful installation of curl, we can import key using following command and add it using sudo command.
“curl https://packages.microsoft.com/key/microsoft.asc | sudo apt-key add –“
5- Due to some network and internet problem I was unable to register key directly from Microsoft site. So if key download fails download key from mentioned path. https://packages.microsoft.com/key/microsoft.asc you can find it in downloads, Open the file, Save it as .asc file and open it in terminal
6- From the terminal windows register key from the following command
“ sudo apt-key add microsoft.asc”
7- After successfully registering GPG key download mssql server from following path.
“curl https://packages.microsoft.com/config/ubuntu/16.04/mssql-server.list | sudo tee /etc/apt/sources.list.d/mssql-server.list”
8- You can check the folder and rights to the downloaded file by executing ls -lrt
“ls –lrt /etc/apt/sources.list.d”
9- After executing all run “sudo apt-get update” before installing SQL Server.
10- Now you are ready to install SQL Server now. Start SQL Server installation using following command.
“sudo apt-get install –y mssql-server”
11- Installation will continue as we can see installation percentage. It will take some time depending on internet connection. Installation will complete with the config setup message.
12- As mentioned in the message, To complete SQL Server setup run following command
“sudo opt/mssql/bin/mssql-conf setup”
It will prompt license agreement message.
13- After completing above step Microsoft will ask for administrator password and will start SQL Server. During my installation I set password as “vSqlserver2017”. In the end you will get Setup completed successfully message.
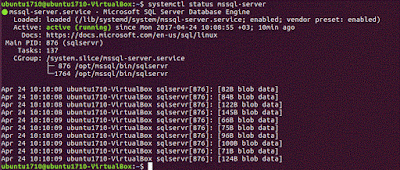
14- You have successfully completed MSSQL Server installation. On restarting you linux server, you can check SQL Server status by executing following command.
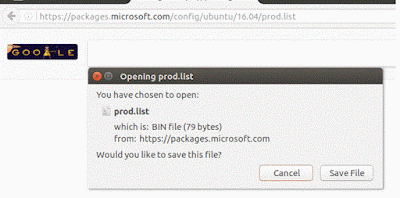
15- We need to Install SQL Server tools by using following command. Using wget we need to download and copy prod.list on sources.list.d path.
16- On getting permission message I am unable to copy on given path. I used same path as I did to register key for SQL Server.
17- I downloaded prod.list file and copy it to sources.list.d
18- Opening root as file manager by entering following command
“sudo nautilus”
19- Following root path will open
20- Reaching at sources.list.d path copyà paste prod.list as follows
21- It is recommended to run get-update command before and after any installation and then start installing tools by following command
“sudo apt-get install mssql-tools –y”
22- Installation will start once all required data will be downloaded.

After completing installation we are going to perform basic SQL Server queries using linux Ubuntu command prompt.
23- SQL Server is active and running. You can connect SQL Server using following command “sqlcmd –S (Server name) –U (username) –P (Password)”
24- Performing basic SQL Server testing through command prompt.
a. Create database
b. Create Table
c. Insert data
d. Query data


